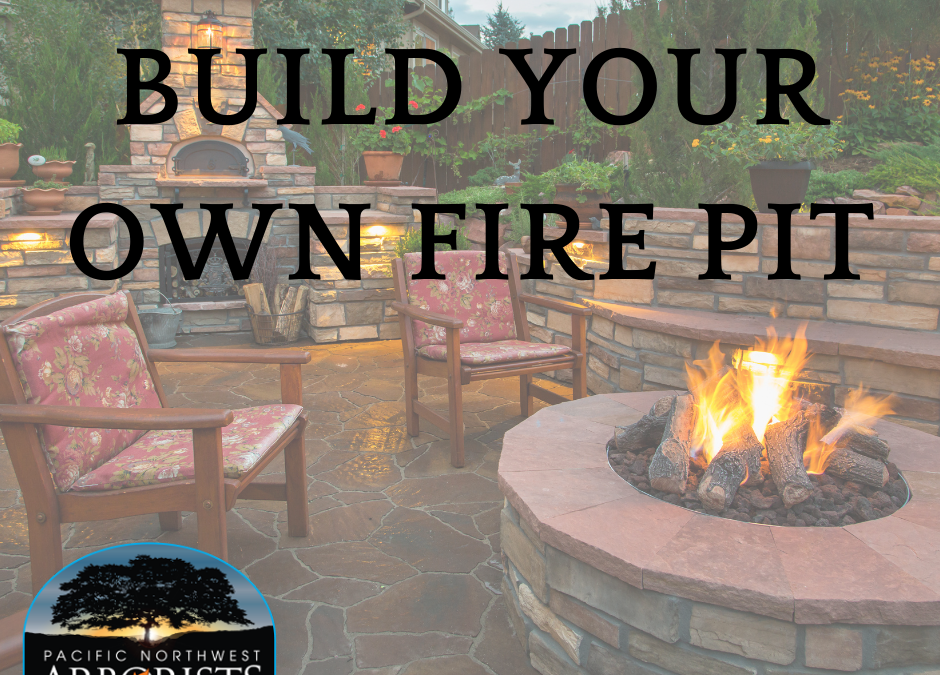
Winter is here and it’s a perfect time to add a warm touch to your backyard! Fire pits are a fantastic addition to the decor of your landscape. Offering the ability to bring the fun outdoors, fire pits are a great gathering spot for your family and friends. Requiring a low level of upkeep, this project is relatively maintenance free.
Follow these tips and steps to learn just how easy it is to build an above ground, custom made fire pit.
THINGS TO CONSIDER FIRST:
Before doing any digging, call 811 to check for underground utilities. Also, before you buy materials or begin work, check local building codes, ordinances and homeowner association guidelines to make sure that fire pits are allowed. Some municipalities require a spark screen, or a metal mesh guard, to prevent sparks from getting into roofs or trees from wood burning fire pits.
LOCATION, LOCATION, LOCATION:
Fire pits should always be at least 10 feet away from the house and as far as possible from overhanging trees. Make sure you’ll have enough room for outdoor furniture around the fire pit, keeping the back legs at least 6 to 7 feet away from the pit. For convenience, you may want to locate your fire pit near your wood pile.
FIRE PIT OPTIONS:
Wood burning or gas, in or above-ground?
If you’re making a wood burning fire pit, getting a metal liner or fire bricks to act as a heat shield between the fire and stone, then fill the bottom with gravel for drainage. Gas pits can be constructed with a manual match light or remote control; however, you should consult with a plumber before installing the gas line.
Typically for families, above-ground fire pits to keep children safe are the most popular option.
MATERIALS NEEDED:
To build this stone, above ground fire pit, you will need the following:
-retaining wall blocks; rectangular blocks make it easy to adjust the layout to a size that works best for your design
-gravel/paver base
–masonry adhesive
FOLLOW THESE STEPS:
1. PREP THE AREA:
Once you have found the right area in your yard to place the fire pit, place a layer of blocks in your desired design. Outline the shape of the pit by tracing the back of the blocks using a shovel. From the traced line, remove about 2 inches of grass and dirt from the area. If desired, you can remove up to 6-8 inches.
2. INSTALL THE PAVER BASE: FOUNDATION FOR THE BLOCKS
Now that all the grass and dirt is removed from the area, tamp down the soil to make the area as level as possible, add or remove dirt to adjust if necessary. Fill the area with about 2 inches of gravel base, and spread with a garden rake. Next, wet the paver base and tamp it down to be level, then add another .5 inch of base, and tamp again. To finish, check to make sure it’s level, adjust if necessary.
3. SET THE STONES:
Bury at least half of the first layer of blocks into the paver base, ensuring each block is touching. Make sure to check the level after the first layer is laid. Next, stagger the second row of blocks on top of the first layers joints. Layers can be laid dry or connected with masonry adhesive, which can be purchased at most landscape or home improvement supply stores.
Continue these steps until the pit is up to about 18 to 24 inches.
If you’re going to use a cap or coping, install it now, using mortar or masonry adhesive to set it into place.
Follow this link if you need to cut blocks in order for them to fit your design.
4. INSTALL FIRE BRICKS OR LINERS:
If you’re installing fire bricks, or any other liner, now is the time to do so.
Line the inside of the fire pit walls with clay fire bricks. Add more paver base, or fire bricks to the bottom of the pit to align the bricks with the top of the fire pit.
5. LAST STEPS:
To complete your project, add a few inches of gravel or lava rocks for drainage and so the fire is at visible level. Lastly, light the fire, sit back and enjoy for endless evenings!