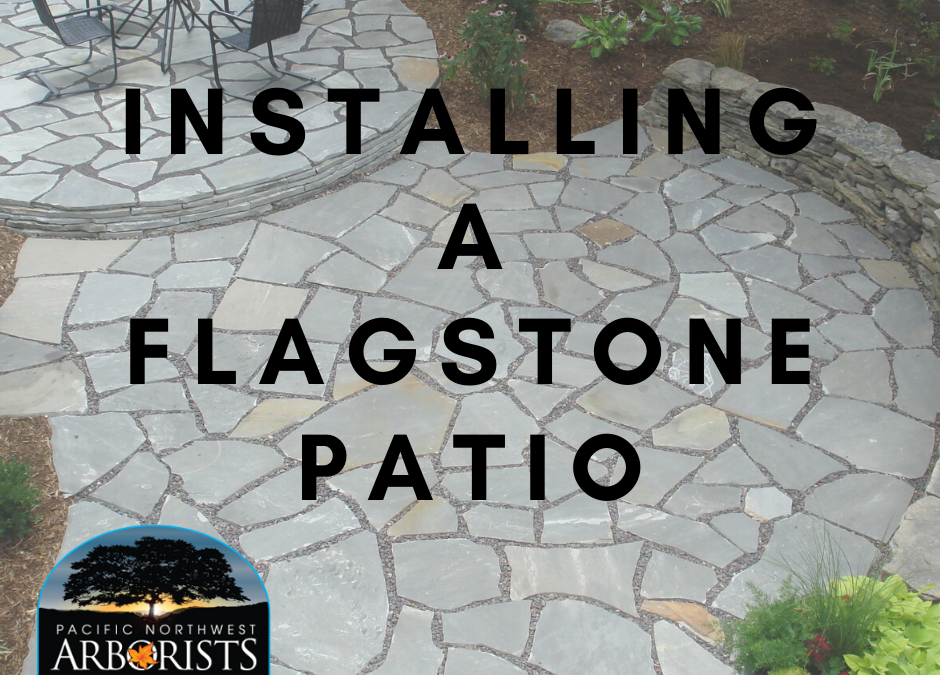
How to Install a Flagstone Patio
Adding a flagstone patio to your yard gives a natural and unique and chic feel to your property. This project involves a bit of heavy lifting and time; however, at the end of it, you’ll be so happy you upgraded your yard. Some people prefer to do a professional patio job, but if you are up for a little DIY then this article is for you!
THINGS TO CONSIDER FIRST:
Design and plan where you’d like to place your patio, and how big you’d like it to be.
What size of flagstone do you want to work with? Keep in mind that the thicker the stones, the more expensive this project can be; however, bigger pieces mean less cutting.
In terms of design, plan out how big the gaps will be between the stones, depending on how you want to fill them. The bigger the gabs, the quicker and easier the process will be because less cutting and fitting is required.
You want your flagstone patio graded at an angle; you don’t want it completely level because of water drainage. To do so, ensure there is a ⅛” drop per foot.
MATERIALS NEEDED:
-shovel
-packed gravel base (type 2 gravel)
-decomposed granite, with the screenings
-flagstone, about 1.5-2 inches thick
-hand tamper or plate compactor
FOLLOW THESE STEPS:
1. PREP THE AREA:
Before beginning any digging, call 811 to check for underground utilities.
The first step to installing your patio will be removing any dirt and rocks to prep the area. Install any irrigation lines because you’re not going to be able to go back and do that later.
The next step is to start digging. Dig down 5-6 inches minimum so you’re able to set the base for your first layer.
2. LAYER 1:
Now you are able to add 3-4 inches of packed gravel base, type 2 gravel. This gravel is inexpensive and makes a great foundation. Using a wheelbarrow, pour it into consistent piles throughout the patio, and use a rake to spread it evenly. Pack the gravel down using either a hand tamper or you can rent a plate compactor.
3. MAKE IT LEVEL:
By using tape or strings, stakes, and a line level you can create a guide as to where you should be leveling your layers to achieve that ⅛” grade. Have a single stake be the low point to which all the other stakes and strings flow to, creating the correct grade for proper drainage.
To use a line level, you place it on the string, and once you find where it is perfectly level, you make a mark on the stake. Then, measure the distance between the stakes, and for each foot- you want to grade down at least ⅛”. So for example: If you had 8 feet between each stake, you’ll want to go down a full inch. OR you can take the easy route, and use a line level that has a ⅛” mark on it, you can use that to mark and tie your string.
4. LEVEL 2:
Once you have installed your gravel base and packed it really well, it’s time to add your decomposed granite. Following the same steps as before, layer out 1 inch of decomposed granite that has screenings; a finer gravel that is easy to level and packs well. Wet down the granite when you’re finished to ensure it’s secure.
5. LEVEL 3:
Now it is time for the heavy lifting and longer process of this project, adding the flagstone. For the third and final layer, you’ll want to use flagstone that is about 1.5-2 inches thick. Placing the bigger pieces around the perimeter first, and puzzling the other pieces inward, you will save time from having to cut any pieces.
If you do have to cut any stone, you’ll want to use an angle grinder, eye protections, ear plugs, and a respirator.
6. CHECK THE LEVEL:
Once you have cut and puzzled all your flagstone together, and you have the seams set as you like, it’s time to level out each individual flagstone. Each flagstone needs to be leveled because they are not all the same thickness, and will have different abnormalities you’ll have to account for.
To do this, you’ll use a level to make sure that any stones aren’t higher or lower than the others; this is primarily to make sure you won’t trip over the stones. If you find a stone that isn’t level with the stones around it, then simply pull the stone up, and add or take out sand. Ensure the sand and stone is level, then use a mallet to set the stone.
7. FILL THE SEAMS:
The last two steps are to use decomposed granite to fill in the seams of the patio. Simply pile the decomposed granite on the stones, and use a push broom to fill in the gaps between the flagstone. Lastly, simply spray down your new patio to set the flagstone in place.
Now, you can add any plants if you’d like, but we suggest that after all that hard work, you should sit back, relax, and enjoy!